
Noise is number one enemy of low-light filming. Learn to minimize it with these techniques
This is a guest post by NY Film Academy.
Technology marches ever forward. So much so, you have to be almost going out of your way if you want to induce any appreciable amount of noise with a mid-range DSLR camera in good lighting. But we’re not quite out of the woods yet, and given the frequency at which the problem comes up on photography and filmmaking forums, video noise when shooting with a DSLR camera is still something that vexes videographers.
Here we take a look at some of the common causes – and solutions – to your noise-based woes.
You don’t need to take out a second mortgage and buy a Canon 1D C in order to get sharp, clear footage - most DSLR cameras these days do an amicable job in just about every shooting scenario, assuming you get to know your kit and how to set up a shoot properly.
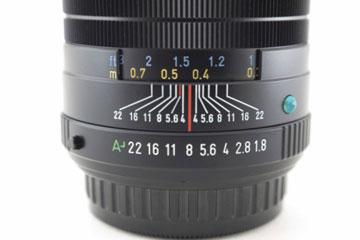
The biggest cause of noise by far is low lighting (in conjunction with not accommodating for it!). The larger the lens diameter, the better; that said, you should be able to get fine results with a good 50mm lens. If you’re shooting manually – recommended when in challenging environments, and because it’ll simply get you more intimate with your gear – make sure your ISO setting is as low as possible before the footage becomes too dark (around 400 works as a rule of thumb). An f-stop of around 1.4 in conjunction with a low ISO should produce some pretty great footage in all but pitch-black environments.

Additionally, zoom out as much as possible to increase light intake and avoid using filters. Shutter speed is a lesser factor but consider reducing it to around 1/30 if you’re still having problems.
If you are shooting in automatic, which can be a bit sketchy in low-light, do make sure your autofocus is setup properly (see our handy guide here).
And remember, some low-lighting conditions don’t have to be… it’s surprising how many people forget to solve the problem at the root by adding some extra light sources!
It’s very easy to get hung up on lighting issues and ISO settings, but when all these have been addressed, you may be left scratching your head as to why you still have noise issues.
Let’s paint the picture. It’s night time and you’re shooting outside, so the lighting is low. However, you had the foresight to schedule the shoot during a full moon. You’ve set the ISO to 400 and even brought along some additional lighting. In theory, you shouldn’t be getting nearly as much noise as you are.
What you might be forgetting as you took your equipment out of the unheated trunk and stand in a field, shivering, is that temperature can have a big impact on your DSLR.
The ideal operating temperatures vary quite largely by camera, but anything outside 32-104 degrees Fahrenheit (0-40 Celsius) can cause problems. It’s rare to find yourself shooting in above 104 degree heat – unless you’re on fire for whatever reason – but it’s commonplace to shoot at or below freezing point. In addition, it plays havoc with your battery life and the cold can make your hands pretty shaky; not a great situation when operating fine equipment!
And this brings us neatly on to…
If your camera is heavy or your hand is naturally shaky, you need a good tripod. In fact, you should have sturdy tripod anyway, even if you’re “just a hobbyist”, since this will solve a heck of a lot of issues beyond just noise.
Ah, post-production – a double-edged sword. On the one hand, it’s a great way of fixing any noise issues that you didn’t notice while shooting. On the other, scores of people become frustrated about the amount of noise they seem to be inducing while fiddling around in After Effects.
It sounds obvious, but many people fall into the trap of assuming everything can be fixed up in post. Not taking the time to set your DSLR up properly before a shoot, especially in low-lighting conditions, just causes more headaches than it solves. You don’t need to start enrolling at film schools to get a hang of good exposure practices – for the most part you’ll pick it up as you go along – but do invest in the time it takes to compensate for any quirky environmental challenges, and if you’re unsure as to how to use your camera in certain conditions, spend some time looking it up. There are a thousand helpful folk online who would be happy to give you some pointers and it’ll be time well spent.
But even professionals have to patch things up in post from time to time. If you find yourself needed to remove noise for whatever reason, there are some great plug-ins which do the job for you (assuming you’re using Adobe). Neat Video and Magic Bullet Denoiser are both highly recommended, but do consider adding a tiny bit of noise or grain after de-noising to make the footage look natural.
Finally, a note on audio noise. If you’ve all of the above is in check and you produce some gorgeous footage but the audio is letting you down, consider applying an auto-gate to the audio track. It’s easy to implement and can drastically improve the sound quality of your clips – here’s a great how-to on the subject which is worth checking out.
Related Posts
1. Focusing test for your DSLR lens
2. View all guest posts on cineserge
3. Write a guest post for cineserge
What's next?
1. Subscribe to updates by email
2. Follow on Twitter & Facebook
3. If you liked this post, please share it ;)